The short version
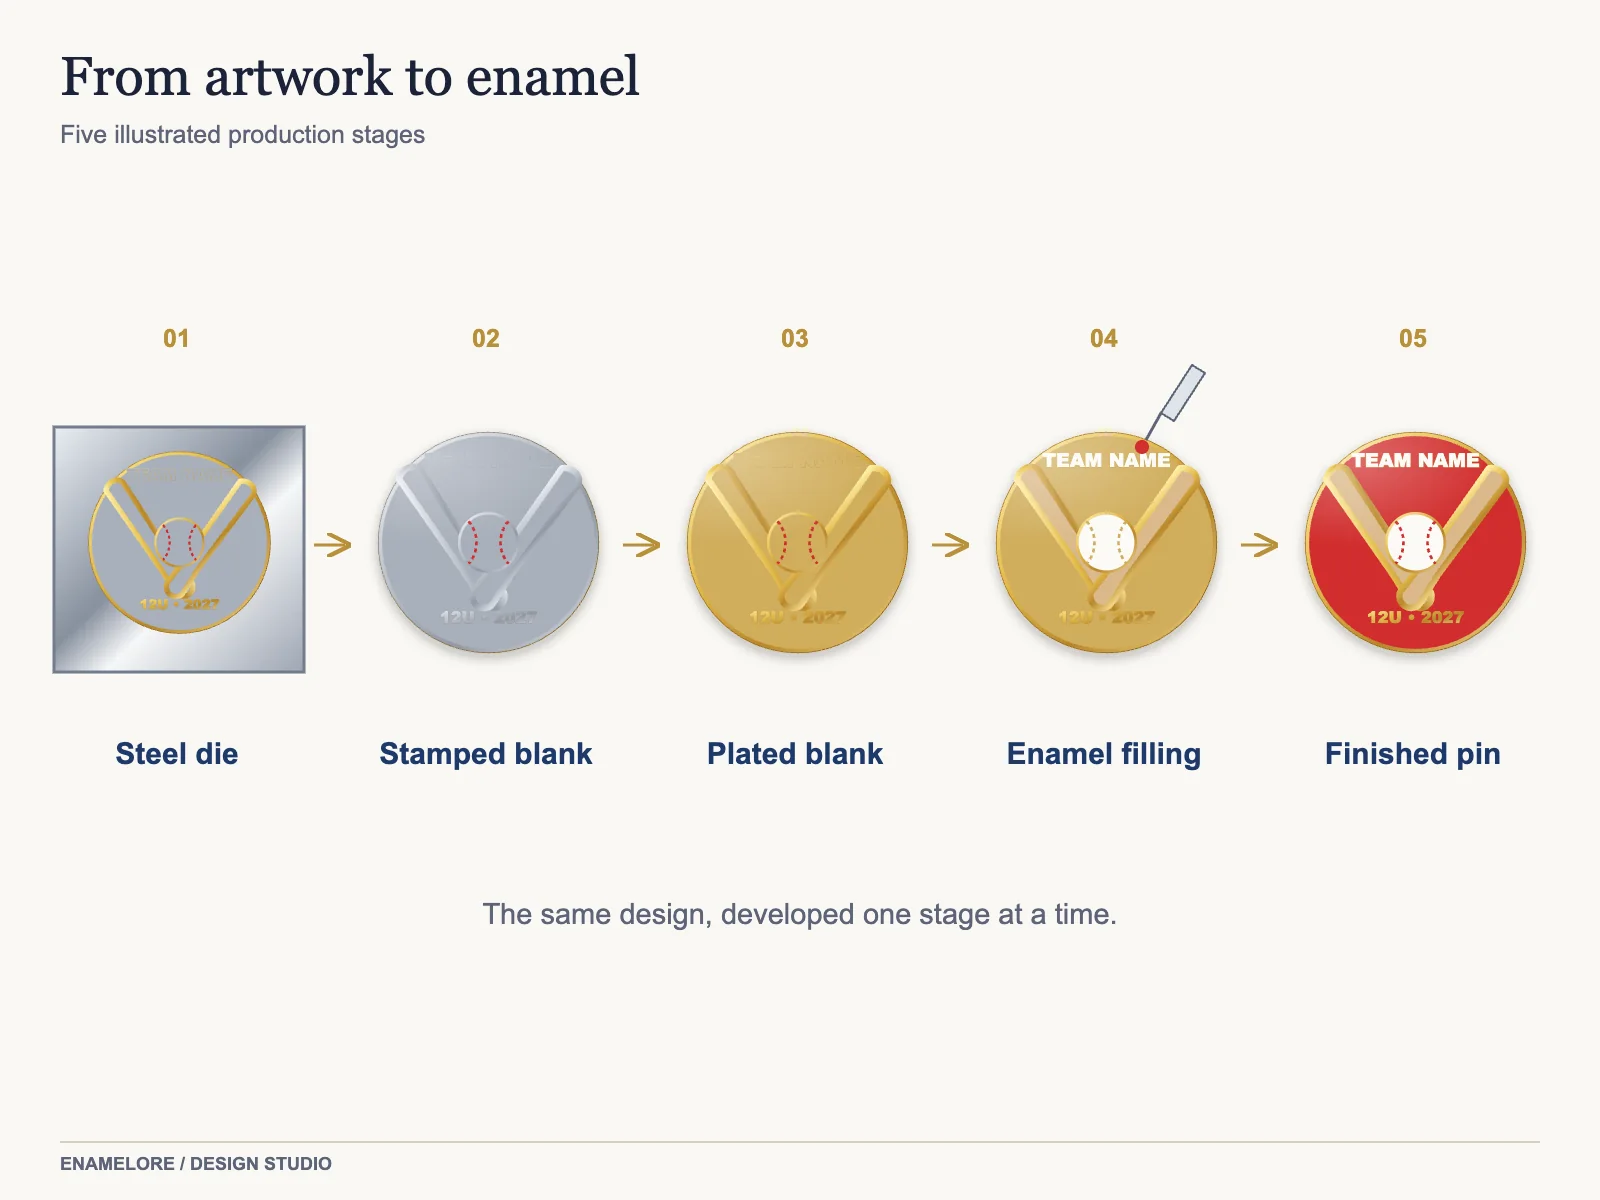
- A design is turned into a vector drawing with every color area enclosed by a line.
- The drawing is engraved into a steel mold.
- The mold strikes the design into a sheet of metal (or shapes zinc alloy for complex pins).
- The blank pin is cut out and the posts are soldered to the back.
- The pin is plated: shiny or antique gold, silver or copper.
- Each color area is filled with enamel by hand and baked.
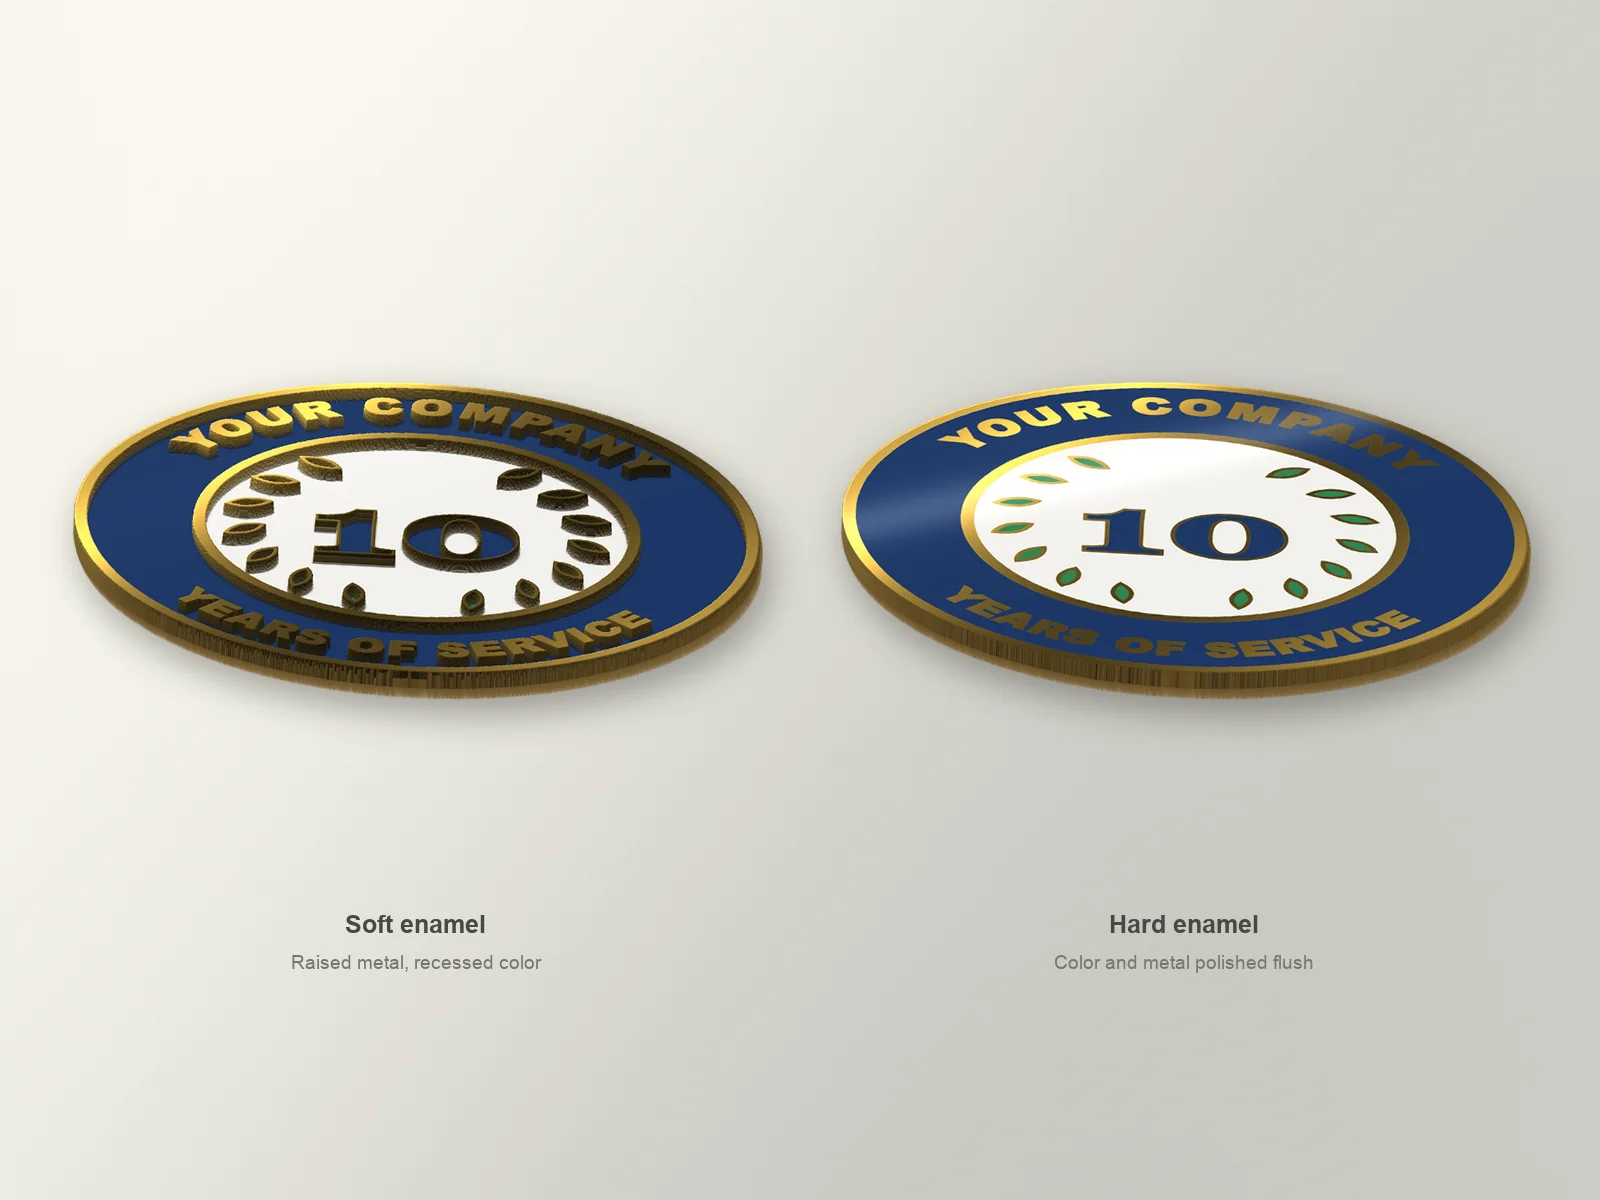
- Hard enamel pins are polished flat; soft enamel pins are left textured.
- Pins are inspected, a clutch is added to each post, and they are bagged.
Each step is explained below with what can go wrong and what it means for your design.
Step 1: Artwork for production
An enamel pin is made of raised metal lines and recessed areas filled with color. The production drawing has to separate every color with a line of metal, set the line thickness so it can be struck cleanly, and size every detail so it can actually be filled. Text that looks crisp on screen may be too small to form in metal. This is why manufacturers redraw customer art: the proof you approve is the production drawing. See our artwork guidelines for minimum sizes.
Step 2: Engraving the mold
The production drawing is engraved, by CNC machine or by hand for fine work, into a hardened steel block. Raised lines on the pin are recesses in the mold, and recessed color areas are raised in the mold. Making and finishing a mold is the main fixed cost of a pin order, which is why small runs cost more per pin. Our guide to mold fees explains it.
Step 3: Striking or casting
Die striking. A sheet of iron, brass or copper is placed under a press, and the mold strikes it with many tons of force, leaving the design in relief. This is how most soft enamel, hard enamel and die struck pins are made.
Die casting. Molten zinc alloy is injected into a mold. Casting allows very complex outlines, fine detail and cut-outs that striking cannot produce.
Step 4: Cutting and attaching posts
The struck pin is cut from the sheet with a cutting die that follows the outline, and the edges are tumbled smooth. Posts are soldered to the back: one for small pins, two for pins larger than about 1.5 inches so they do not spin. A backstamp is laser engraved on the back after plating.
Step 5: Plating
The pins are electroplated in batches. For soft enamel, plating happens before the color, because the metal lines stay visible. For hard enamel, a base layer is applied first and the final plating comes after polishing. Plating choices are covered in our plating guide.
Step 6: Enamel filling and baking
Enamel is a colored paste. Workers fill each recessed area by hand with a fine syringe, one color at a time, and the pins are baked to cure the enamel. For soft enamel, the enamel shrinks a little as it cures and settles below the metal lines. For hard enamel, colors are overfilled in layers. This is the most skilled and most time-consuming step, and it is why enamel pins are still largely handmade. Effects such as glitter and glow-in-the-dark are mixed into the enamel at this stage.
Step 7: Polishing (hard enamel) or epoxy (optional)
Hard enamel pins are ground and polished until the enamel and the metal lines form one smooth surface. Soft enamel pins can be left textured or coated with a thin clear epoxy dome. See soft vs hard enamel pins for how the two compare.
Step 8: Inspection and packing
Pins are checked for missing color, overfills, plating flaws, broken posts and specks. Good factories photograph a sample of the batch before shipping, which we share with every customer. Pins are then fitted with clutches and bagged.
How long it takes
From approved proof to delivered pins, a standard order takes up to 30 business days. Molds, filling and baking account for most of it. See how long custom pins take.
Can I make real enamel pins at home?
Not in the same way. The mold and the press are industrial equipment. But if you want to make a handful of pins yourself, these methods work:
- Shrink plastic. Draw on shrinkable plastic sheet, cut, bake and glue a pin back. Cheap and fun; looks handmade.
- Polymer clay. Sculpt, bake, paint and seal. Good for 3D shapes.
- Resin in a silicone mold. Pour colored resin into a mold, cure, and glue on a back. Looks glossy, takes practice.
- Blank metal pins with paint or enamel paint. Some craft suppliers sell blank pin shapes with recessed areas you can fill with colored resin or enamel paint.
These are great for prototypes, gifts or testing a design. For a product that looks and feels like a real enamel pin, or for more than a handful, a manufacturer is the practical route.
How to get your own enamel pins made
- Sketch your idea or prepare your artwork; our guide how to design an enamel pin helps.
- Decide on size and quantity; the pin size guide and pricing page help with both.
- Request a proof. With us it is free and arrives within 24 hours; send your design on the quote form.
- Approve the proof and pay; production and delivery follow.
If you plan to sell your pins, read how to sell enamel pins next.
Written by the Enamelore team, who proof every order. Questions about this guide? Email hello@enamelore.com.